
The Shade House
Without this I don't think I'd have anywhere near the
modest success I have in propagation. Even so I can only support
most of the species until the first of the heavier frosts, after that
they get clobbered. A few species, like the figs I'm growing,
will mostly try to sprout again, possibly over 90% of the figs sprout
again. Many rainforest species seedlings don't die back, they
just die.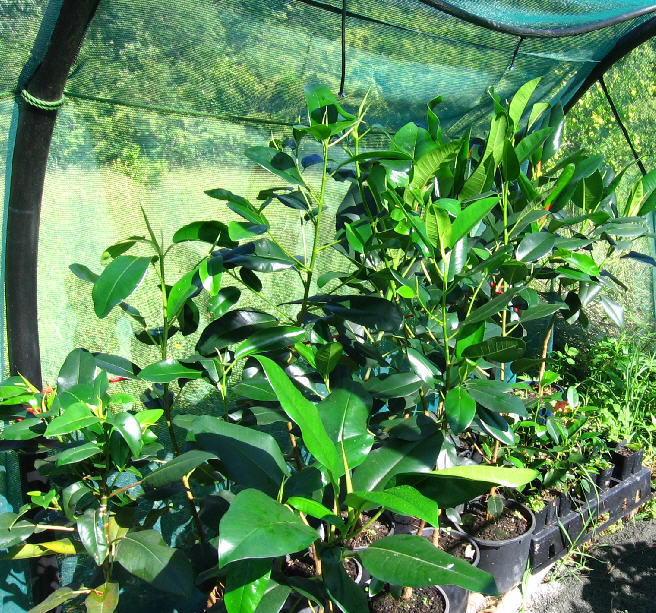 The
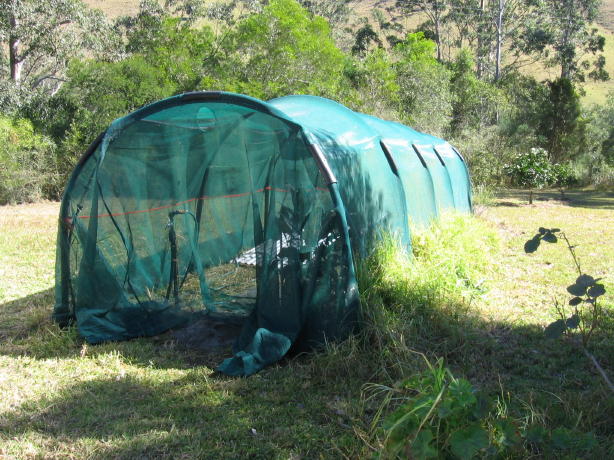
Shade House is made from 50% knitted shade cloth. I decided on
this over the more readily available 75% simply to give my seedlings
more sunlight, it seems to work, even the hottest days are moderately
pleasant inside though rather humid which is the desired effect.
It takes a reasonable level of frost to have an effect, which it does
every year. One day I intend to put in a Hot House so I can over Winter
more delicate species. Maybe I'll keep it warm with some sort of
basic solar hot water system, the frosty nights are after clear sunny
16 to 18 degree days, cloudy days are always warmer nights.
The
Shade House is made from 50% knitted shade cloth. I decided on
this over the more readily available 75% simply to give my seedlings
more sunlight, it seems to work, even the hottest days are moderately
pleasant inside though rather humid which is the desired effect.
It takes a reasonable level of frost to have an effect, which it does
every year. One day I intend to put in a Hot House so I can over Winter
more delicate species. Maybe I'll keep it warm with some sort of
basic solar hot water system, the frosty nights are after clear sunny
16 to 18 degree days, cloudy days are always warmer nights.The frame work is 50mm high density rural poly tubing placed over star pickets that are driven into the ground until there is about a metre available then they are bent inwards slightly. A very simple design which I've since seen used by others.
Pest control is carried out by Superb Fairy Wrenss and the ever present frogs, mostly little green ones that seem to spend their days nestled in the fig leaves. I have a couple of large pot bases to act as little ponds for them.
Overhead watering is 10 minutes every second or third day. We are entirely on tank water, we have a few tanks. The water controller is a tap timer, using AA batteries, trickle charged by a solar powered garden light, with the light disabled. Shelving is second hand corrugated iron resting on second hand bridge deck timbers mostly, off cuts that are too short to make our own internal bridges from.
Because I already had the 50mm poly tubing the only item we actually bought was the shade cloth, the star pickets were second hand too.
 My
only challenge left is to make an actual door in one end. While the
cloth is pegged onto the u shaped poly tubing with halves of tubing
screwed onto each of the overhead struts, the shade cloth is only
pegged down to the ground with a timber beam at one end, the downhill
end. It has never shown any real attempt to fly off, over time
the edges have been grown over by grass on the outside.
My
only challenge left is to make an actual door in one end. While the
cloth is pegged onto the u shaped poly tubing with halves of tubing
screwed onto each of the overhead struts, the shade cloth is only
pegged down to the ground with a timber beam at one end, the downhill
end. It has never shown any real attempt to fly off, over time
the edges have been grown over by grass on the outside. As I said earlier, it only ever wobbles, maybe one day I will have to replace the star pickets with actual new ones, they are probably already rusted through, maybe I'll use galvanised star pickets then.
Occaisionally I'll pull the grass off the sides to let in more light for smaller seedlings, have to be careful of frogs in the grass though, mowing is not allowed just there.
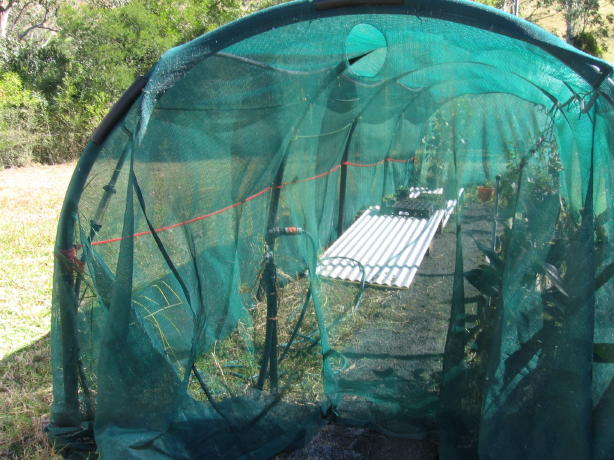
The hole near the top is so the Superb Fairy Wrens who wander in from time to time can escape. They'll come in under the door, the flap will close and they can't get out, but they do fly up to the top of the uphill end of the shade house, that made it easy to decide where to make their escape hatch.
 With the threat of heavy frosts approaching there are not many plants left in the shade house, most have been planted out.
The red rope is to hold the shade cloth out on the edges, stops it sagging inwards, which allows me to have taller plants near the edges, it was only an after thought. There are no struts of any kind linking one piece of poly to the other, just the shade cloth. In truly severe storms it does seem to wobble a little but that is all.
The hose is only used for watering in newly potted plants, gravity fed, pleasantly low pressure out of a rectanglular rose, just like you get out of a watering can that never runs out.
On the left a metre or so above ground you can see the filter for the overhead sprays.
The path was originally saw dust from a local mill which rotted some time ago, now it's left over blue metal dust from water tank bases.
And an important detail, we bought the shade cloth already knitted to size. We put up the frame first to get a more accurate idea of how long, wide and high (so I could walk underneath) it needed to be. Then we got out a tape measue and measured over the top, adding 60cm, for 30cm each side to lay on the ground.
You can see the only seam running along the left hand side a little below the drooping 20mm overhead spray pipe.

